Introduction
The main aim of this Quantum Key Distribution Protocols chapter is to evaluate the results obtained once the code that was explained in the previous chapter and to estimate the performance of the application results with respect to the aims and objectives identified across this Java and SQL Project. The entire process of encryption and decryption and the actual quantum key generated across the execution of this application with respect to the quantum cryptography are evaluated and their performance against the secure communication is explained in detail across this chapter. The corresponding screens achieved once the code is executed and the performance of database is also explained with respect to the quantum key cryptography aspects.
Configuring the database
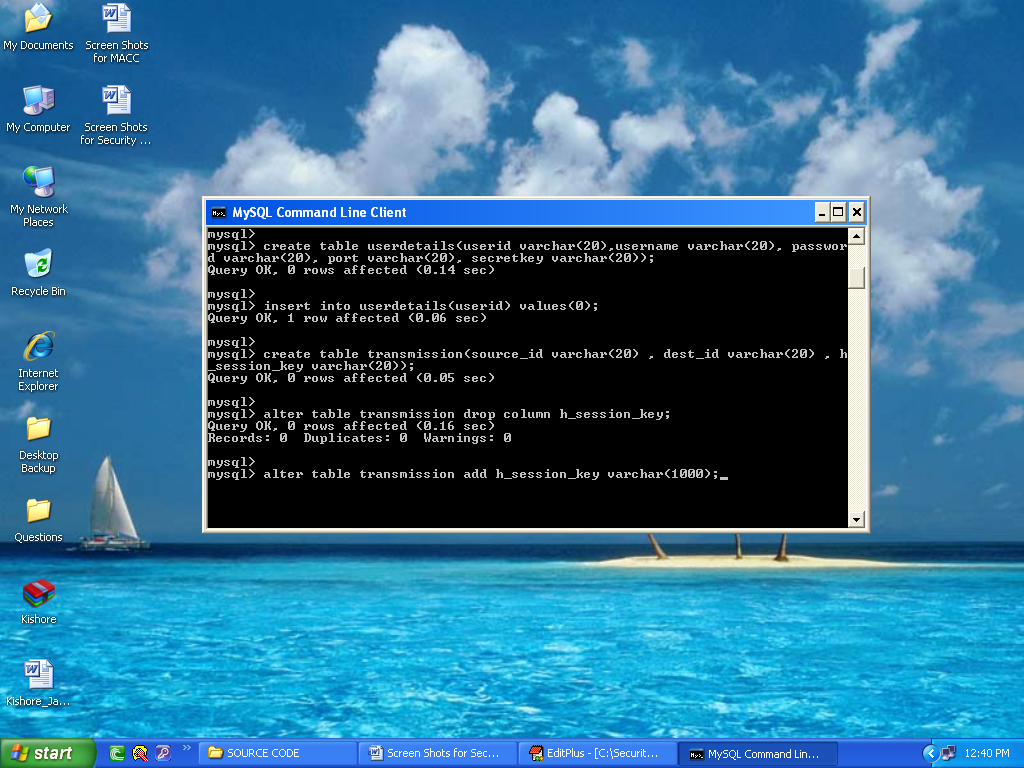
The initial step to test the results achieved across the application, is to configure the database and in this application as explained in the previous chapters, My SQL is used as the database and the corresponding configuration steps and the resultant screens are explained as below. Once the SQL command is opened successfully and the database is loaded, the next step is to load the required data to the database and then it is done by just simply copying all the required data to be communicated to the database folder Quantum1.sql and after that the below screen is displayed to the users
From the above screen it is clear that all the required tables are copied to the My SQL database and those tables are displayed to the users as shown in the above screenshot. Few tables like User details and Transmission are displayed to the users and also the corresponding columns holds the details of the users like user id, password, port number and the session key values respectively as shown in the above screen.
Trusted center
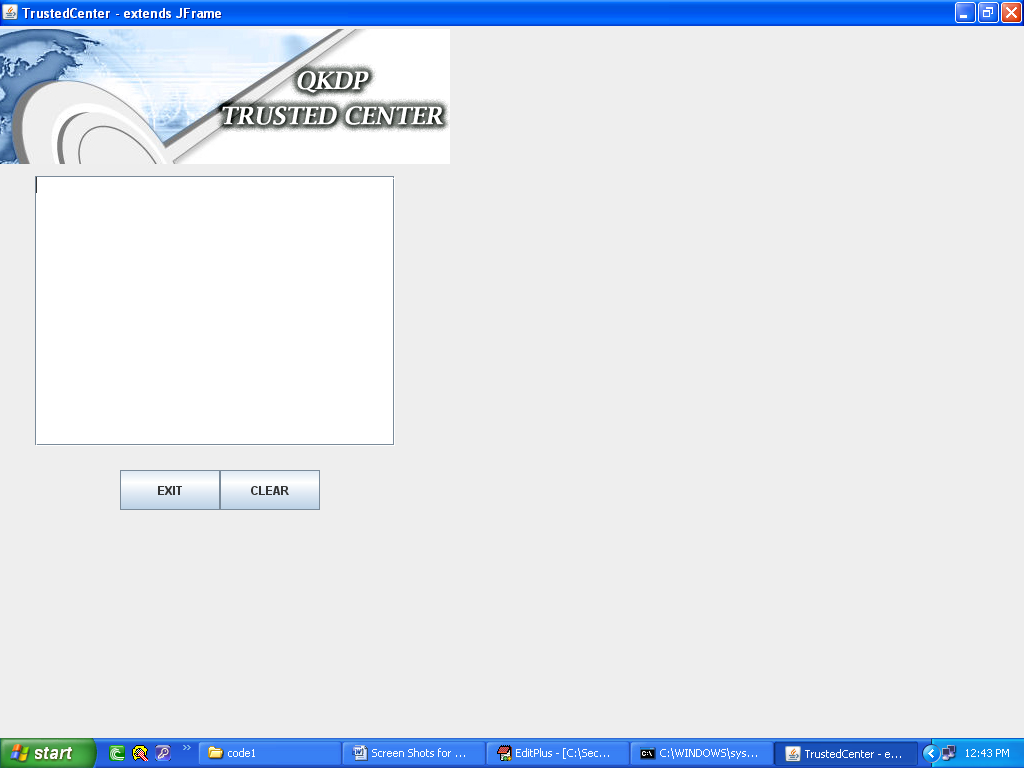
Trusted center, is the programming module, where the sender and receiver across the communication process trust a third party and share their public and private keys and exchange the required information and the corresponding screen related to the trusted center is shown in the below screenshot.
From the screen, it is clear that either the sender or receiver can exchange the private keys and the share the required information. The functionality of the trusted center is displayed on the text area as provided and the information can be cleared or exited by using the buttons as shown in the screen. The actual nature of information that is displayed across the trusted center is shown in the next screens as shown below.
User login
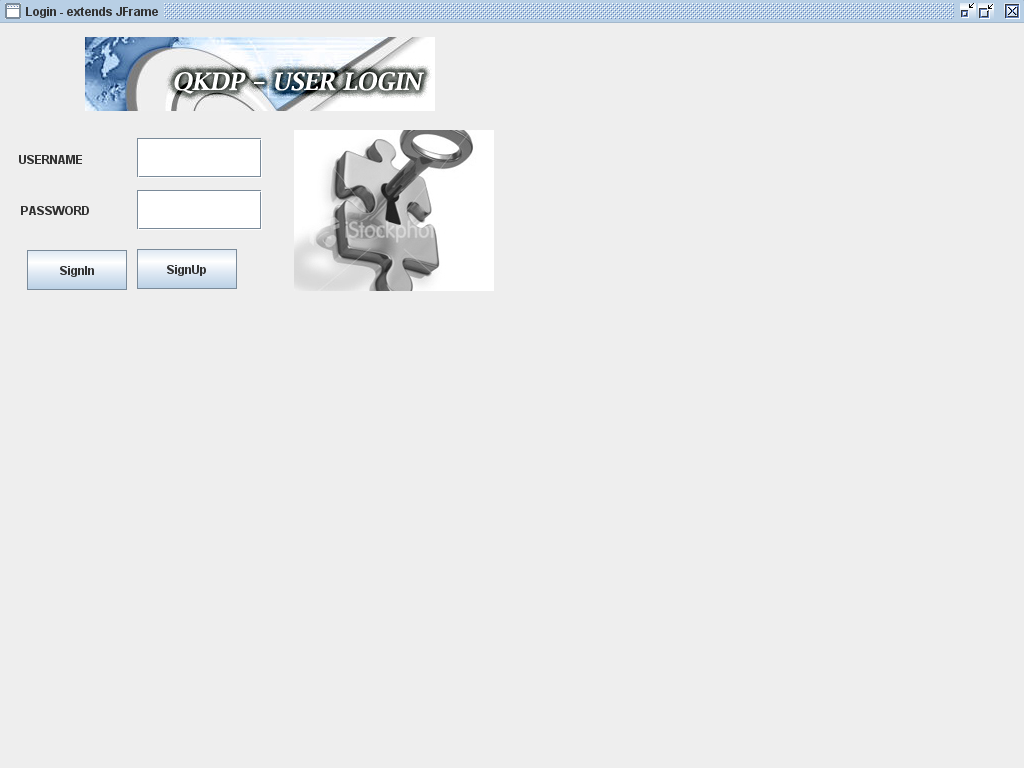
Any user who need to use this application, should login to the system by entering their id and password that were provided to them during the registration process. Any client or server user should initially register with the system to share the quantum keys and also exchange the corresponding confidential information. If the users are not registered, a separate process module is invoked to register the users and the corresponding resultant screens are as shown below
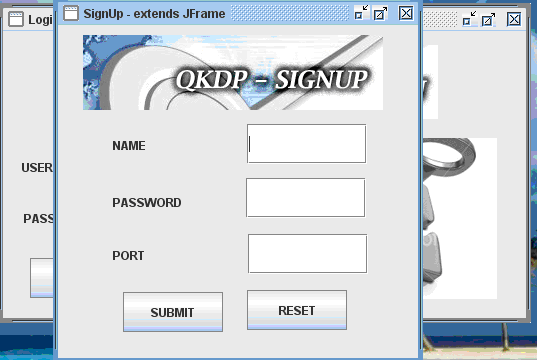
From the above screen it is clear that the users can either login to the application, if they are already registered and can also raise a request to register with the system. Two different text fields are provided to the users to login to the system with their user id and password and once they enter a valid set of data, they are redirected to the actual application and if they provide an invalid data, they are made to wait on the same screen. The actual process to be followed to register with the application is shown in the below screen
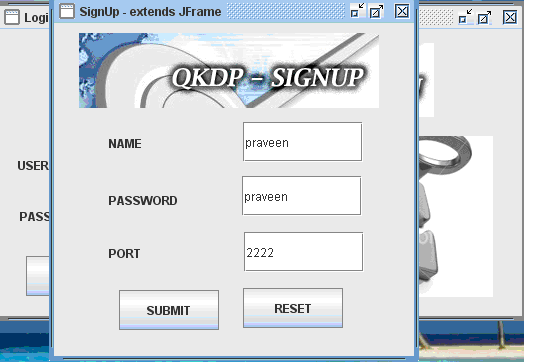
From the above screen it is clear that the users can enter their user name, the desired password and also they should enter the port number to process with the further communication process. Once these values are entered and the submit button is clicked, the corresponding values are saved across the database table that was shown in the previous screenshots. Once the use enters the required values to the user name, password and the port number, a separate secret key is generated across the server and the key is shared with the user for the further communication process like sending the files. Below screen shows the actual procedure implemented to generate the secret key once the values are entered across the fields in the registration process.
Secret key generation
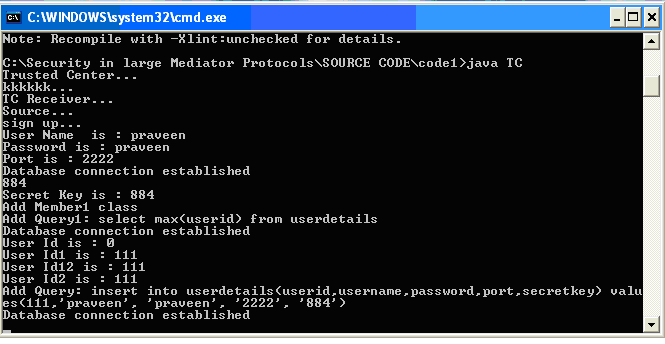
Once these values are entered and the submit button is clicked, the corresponding values are saved across the database and the server window is launched where the actual process of secret key generation is displayed and the corresponding screenshot is as shown below.
From the above screen it is clear that once the user enter the values across the registration process, the server module is invoked and the sign up process is initiated. A random secret key is generated and displayed to the corresponding user and the same values are also stored across the UserDetails table as shown in the above screen with respect to the user id, password, port number and the random secret key generated as the row values as shown in the above screen.
Choosing the destination
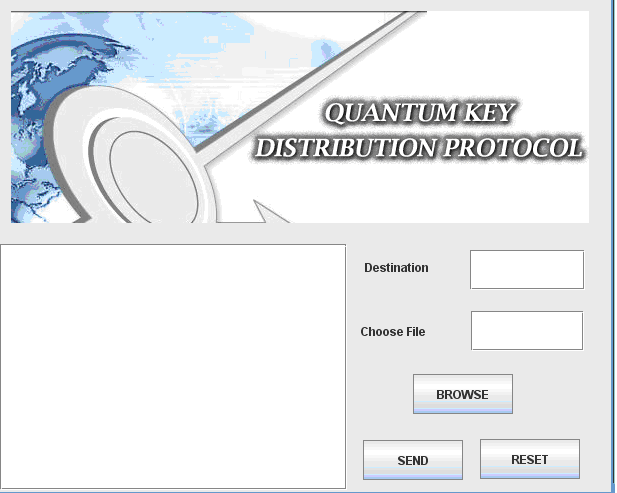
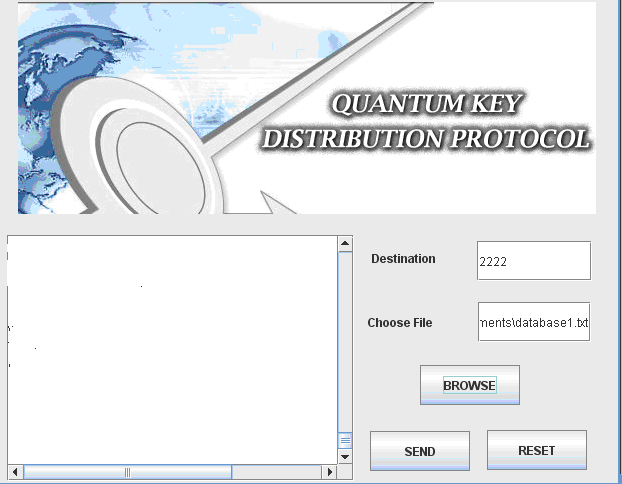
Once the user has registered successfully and the secret key is generated, the corresponding user can login and use the application. The first step in this application is to send the file and choosing the destination to send the file and the corresponding screenshot is as shown below.
From the above screen it is clear that users can enter the destination address at the text field provided and also choose the required file by just clicking on the browse button and once done, by clicking on the send button, the file can be send across the network to the destination and the further process actually implemented is shown in the below screenshots.
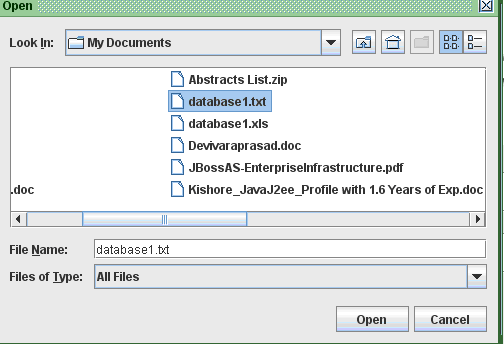
Once the browse button is clicked, a browse window is opened and the users can select the desired file to be sent across the destination by just clicking on the open button and once done below screen is displayed.
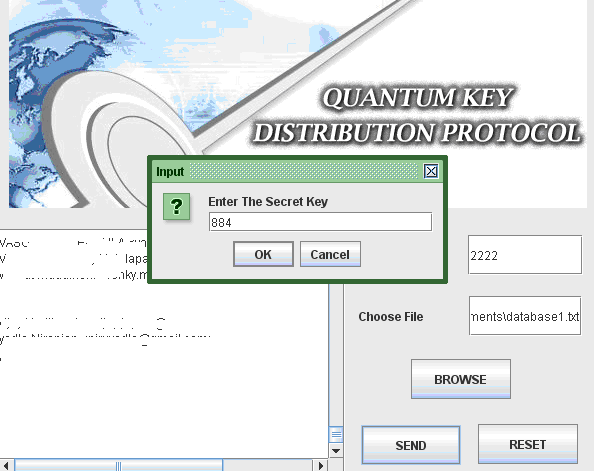
From the above screen it is clear that, the selected file path is displayed on the Choose file text field and also the contents of the file choosen are displayed on the text area provided as shown in the above screenshot. Once the required file is choosen, now the users can click on the send button to the destination and the destination is set to the port number of the user and also the users should enter the secret key that was generated across the registration process as shown in the below screenshot.
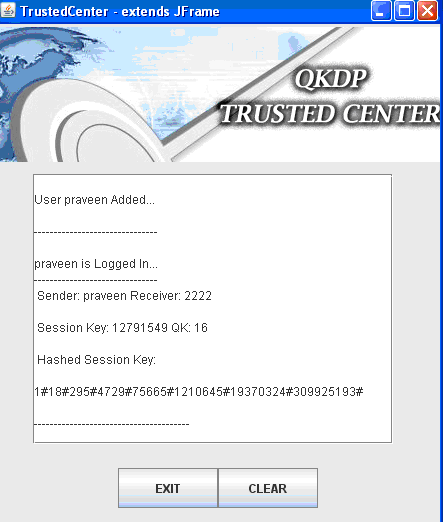
Now the users should enter the secret key as shown in the above screen and once the value is entered now the server verified the key and then if the value is correct, the trusted center is invoked to test the validity of the data sent and the destination details as shown in the below screenshot.
From the above screen it is clear that the user details are verified and the corresponding receiver details are also fetched from the database based on the destination port number and in this project, the sender and receiver are set to same values to avoid the complexity in connecting the ports and also a separate Hashed session key is also generated and displayed across the text area of the trusted center window and the corresponding quantum key generated is also displayed to verify the validity of the quantum cryptography as shown in the above screen. These values are generated based on the random functions used as discussed in the previous chapter.
Receiver side results
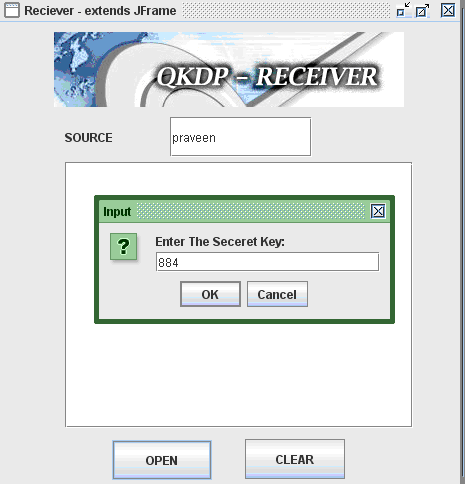
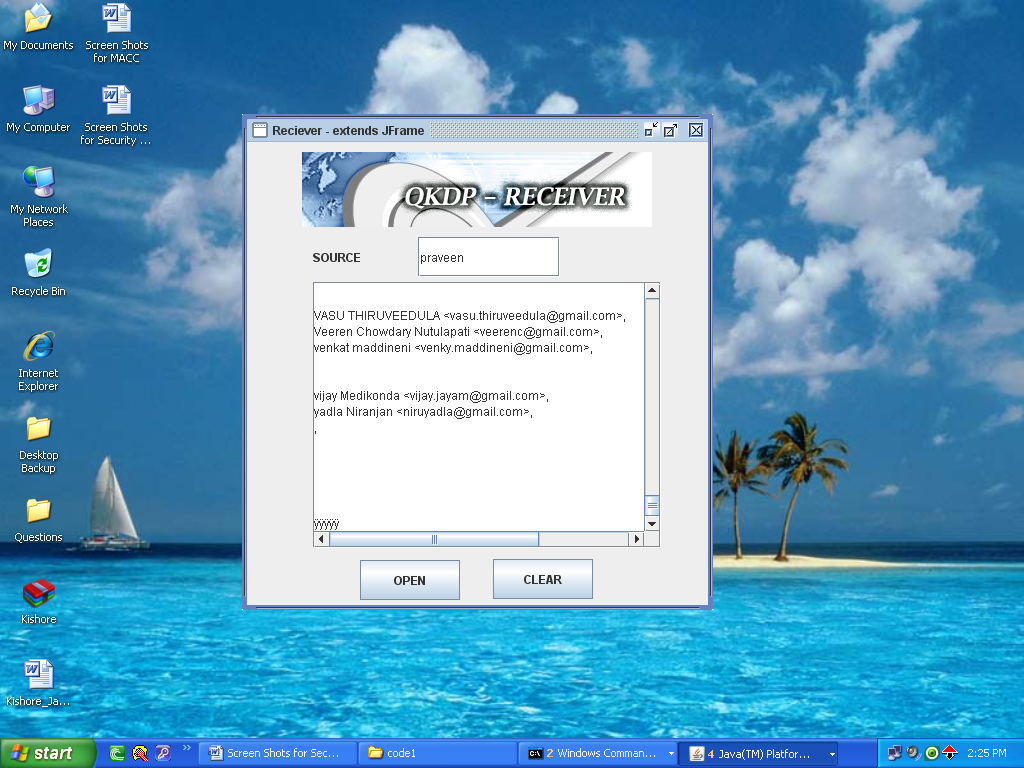
Once the sender has sent any file by using the destination port number and also once the validity is approved across the trusted center, now it’s the turn of receiver to check the data being sent and for this purpose receiver should enter the source name and the corresponding screen is as shown below.
From the above screen it is clear that the source name and the corresponding secret key of the sender should be enter to view the actual file sent by the sender once the secret key is entered, the connection to the sender and receiver is check as shown in the below screenshot.
From the above screen it is clear that, now the receiver can receiver the actual data sent by the sender and in this process several steps like verifying the quantum key at the trusted center are also done and they are shown in the appendix section as the screenshots.
This Paper is written & submitted by Vamshidhar A.

