
Code Explanation
To develop the proposed Enterprise Collaboration Tool system, We have created a java based web application and used Oracle as my database to the application. All the required front end pages are created using jsp files, where the user interface is created. Following are few important jsp files used in this application and the detailed description and coding procedure followed is as discussed below
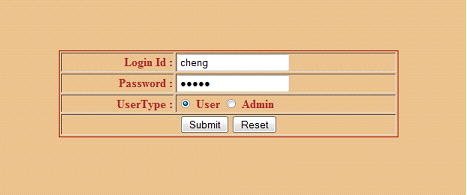
Login screen shot of the application is as shown below:

Login id and Password fields are created on the html file and the tags like td and tr used to align the text fields in a table. Role based login is provided to the end user, where a user and administrator can login to the system. Different set of activities are designated to the user and admin and they are activated based on the login mode selected by the end user. When the user login to the system, they are provided with some links like Meeting, Scheduling and Calendar. These links are the basic activities that any user can perform related to their enterprise collaboration. If Admin is the user and after the successful login to the system, a welcome page is shown to the user as shown in the below screen.
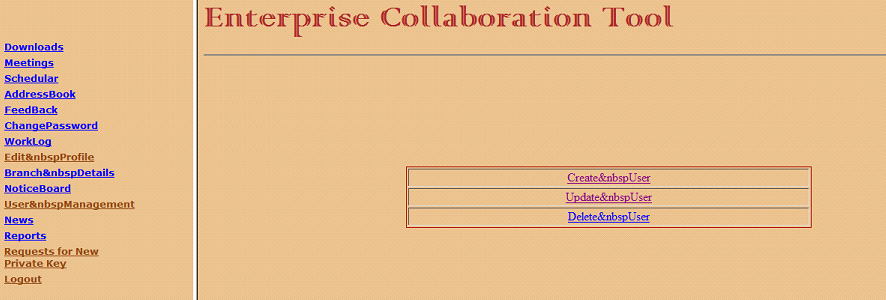
Administrator is provided with the options like Create user, Update user and deletes an existing user. Admin user can create a new user by clicking on the link Create User and the basic coding logic used is as explained below
A jsp file adduser is created to add a particular user to the database. This jsp holds the logic to enter the required field attributes related to the user details and below code is used to add the user
[php]
}
if(document.form1.fname.value==""){
alert("ENTER FIRST NAME OF THE USER");
document.form1.fname.focus();
return false;
}
if(document.form1.lname.value==""){
alert("ENTER LAST NAME OF THE USER");
document.form1.lname.focus();
return false;
}
if(document.form1.address.value==""){
alert("ENTER ADDRESS OF THE USER");
document.form1.address.focus();
return false;
}
if(document.form1.mailid.value==""){
alert("ENTER MAILID OF THE USER");
document.form1.mailid.focus();
return false;
[/php]
Once the field values are entered to the jsp file, these values are finally added to the database. A database object is created to the Oracle database using Class.forName object and Driver manager is used to establish the connection to the database using thin driver. Below code is used to establish the connection to the database
[php]</pre>
ResultSet rset=null;
DBConnection dbcon=new dbgeneralimpl();
c=dbcon.getConnection();
con=dbcon.getConnection();
st=c.createStatement();
<pre>[/php]
Similar type of coding is implemented to update and delete users. Below screen shot shows the procedure to add a new user.

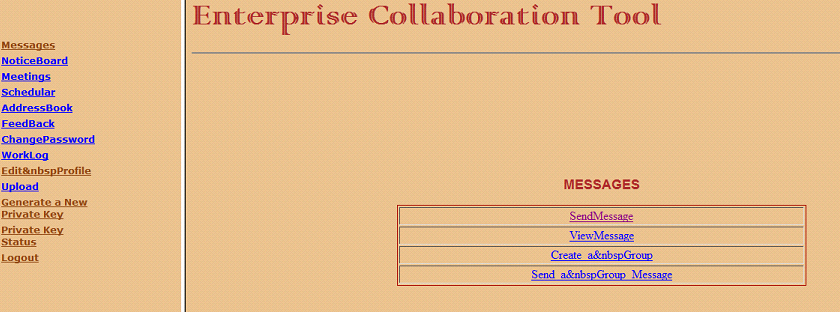
Once the users are registered with the database, now the user can login to the system and perform the activities like Sending a message, view the messages and request for a new key as shown in the below screen shot
Once the user login is successful, they are navigated to the user home page with a welcome message and then the user can perform the activities mentioned above and the corresponding screen shot is as below
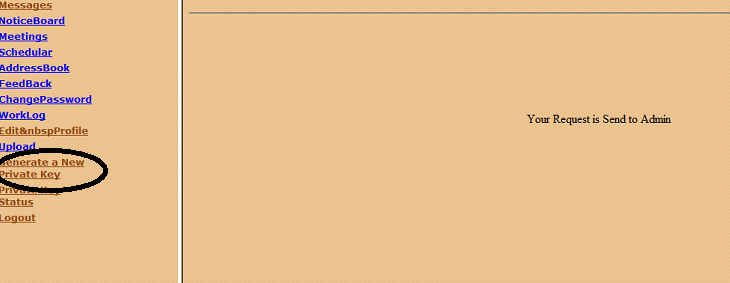
At the first login of the user, they should raise a request for new private key by clicking on the link at the left frame “Generate a New Private Key”. Once the action is performed, navigation is shifted to new key generation request page and the corresponding code is as discussed below
[php]</pre>
Connection c=null;
Statement st=null;
ResultSet rs=null;
DBConnection dbcon=new dbgeneralimpl();
c=dbcon.getConnection();
st=c.createStatement();
String query="select userid from keygenerate_twm";
rs=st.executeQuery(query);
while(rs.next())
{
uuser1=rs.getString(1);
System.out.println("userid is : " +uuser1);
}
if(uuser.equals(uuser1))
{
%>
<tr><td> U R Already Have a Private Key </td></tr>
<% }
else
{
Random generator = new Random();
int ra = generator.nextInt(50000);
System.out.println("Random Value is : " +ra);
String query1="insert into keygenerate_twm(userid,keyvale,status) values(‘"+uuser+"’,’"+ra+"’,’pending’)";
System.out.println("Query 1 is : " +query1);
int in=st.executeUpdate(query1);
if(in==1)
{ %>
<tr><td> Your Request is Send to Admin </td></tr>
<%}
else
{%>
<tr><td> process is Pending </td></tr>
<pre>[/php]
User session is tracked by the session variable and the corresponding user id is fetched from the user login and based on the id, a query is build to the database table from keygenerate_twm. The coding logic first checks if the user has already a private key and if this is the case, an error message is displayed to the user and if this is the first time a user is requesting the private key, the logic is shifted toward new key generation. Random class is used to generate a random number and the same is updated to the table as the private key of the user and the corresponding status of the key request is updated by the administrator. Below screen shot shows the procedure discussed
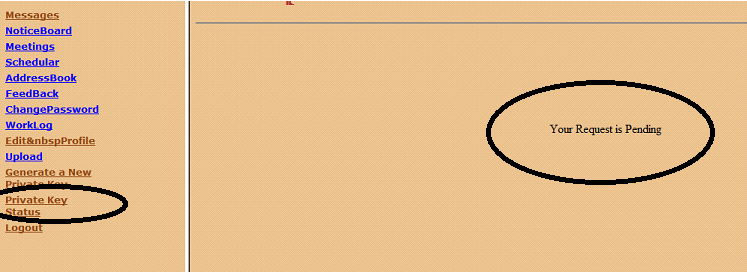
Once a request is placed for a new Private key, now the users can track the status of the request by clicking on the link Private Key Status and the corresponding code used is explained as below
[php]
String query="select userid,keyvale,status from keygenerate_twm where userid=’"+uuser+"’";
System.out.println("Query is : " +query);
rs=st.executeQuery(query);
while(rs.next())
{
uuser1=rs.getString(1);
System.out.println("userid is : " +uuser1);
key=rs.getString(2);
System.out.println("Key is : " +key);
sta=rs.getString(3);
System.out.println("Status is : " +sta);
}
if(sta.equals(‘pending’))
{
%>
<tr><td> Your Request is Pending </td></tr>
<% }
else if(sta.equals(‘Accept’))
{
%>
<tr><td> Your Request is Accepted </td></tr>
<pre>[/php]
Based on the user id that was fetched from the session attributes, a query is built to the database to know the current status of the private key request. A result set is built from the query statement created and based on the result set; the status is compared with pending and accepts. If and else loops are used to compare the status and the corresponding status is updated to the user as shown in the below screen capture
Now the administrators can login to the their respective role and can approve the request from the users regarding the private key and coding followed is as explained below
[php]
ResultSet rs=null;
DBConnection dbcon=new dbgeneralimpl();
c=dbcon.getConnection();
st=c.createStatement();
String user=(String)session.getAttribute("user");
rs=st.executeQuery("select * from keygenerate_twm");
while(rs.next()){
String uid=rs.getString(1);
session.setAttribute("usid",uid);
%>
<tr align="center">
<td><font size="3" color="#DF4800"><%=uid%></font></td>
<td><a href="AcceptKey.jsp?id=<%=uid%>"><font size="3" color="#DF4800">Accept</font></a></td>
<td><a href="DeleteKey.jsp?id=<%=uid%>"><font size="3" color="#DF4800">Reject</font></a></td>
</tr>
<pre>[/php]
Below screen shot explains the procedure followed by the administrator

Once the requested for private key is accepted by the user, now the users can login back and check the status as shown in the below screen

Now the users can do rest of the activities like sending or receiving the data from different users and below screen shot shows the procedure to be followed

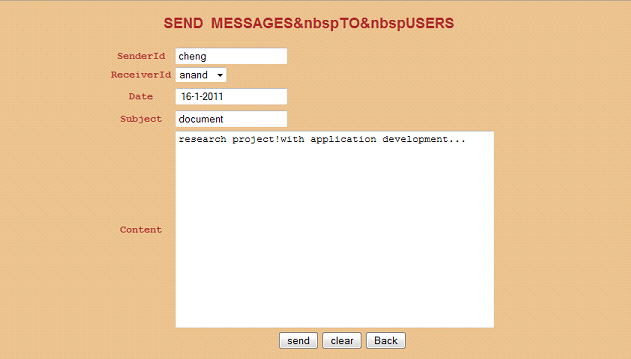
Once the user click on the Send message, they can select the desire users to whom they want to send the message and the corresponding screen and related code is as explained below
[php]</pre>
Connection c=null;
Statement st=null;
ResultSet rs=null;
DBConnection dbcon=new dbgeneralimpl();
c=dbcon.getConnection();
st=c.createStatement();
rs=st.executeQuery("select * from login_twm");
%>
<select name="receiver">
<%while(rs.next()){%>
<option value="<%=rs.getString(1)%>"><%=rs.getString(1)%></option >
<%}%>
</select>
</td> </tr><tr><td>
<pre>[/php]
A list with the entire existing user is populated at the user interface and this is derived by constructing a query to the database table login_twm and the list values are populated using the option tag. Result set is used to fetch all the results from the users table and the particular user name is fetched using the statement rs.getString(1), where the first column of the row fetched is listed at the user interface and the corresponding screen shot is as shown below
Now the user can view the messages in their inbox by clicking on the link view message at the user interface and the corresponding code and screen shot are as shown below
[php]</pre>
onnection c=null;
Statement st=null;
ResultSet rs=null;
DBConnection dbcon=new dbgeneralimpl();
c=dbcon.getConnection();
st=c.createStatement();
String sendid=null;
String user=(String)session.getAttribute("user");
rs=st.executeQuery("select * from messages_twm where receiverid=’"+user+"’");
while(rs.next()){
sendid=rs.getString(1);
System.out.println("SenderId is : " +sendid);
session.setAttribute("sid",sendid);
%>
<pre>[/php]
A session attribute is used to know the sender details and the corresponding receiver id is fetched from this session attribute. A query statement is built on the messages_twm, using the where condition and all the messages related to the current user are fetched from the database and displayed as shown in the below screen

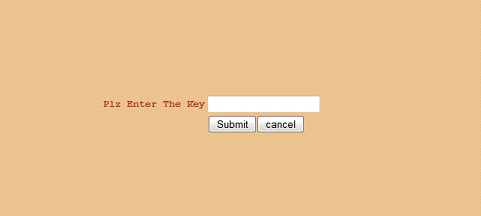
Now the user can either view or delete the message and if the user clicks on the Open link, they can view the message after entering the valid private key of the user and the related code used to develop this logic is as explained below
[php]</pre>
Connection c=null;
Statement st=null;
ResultSet rs=null;
String key=null;
DBConnection dbcon=new dbgeneralimpl();
c=dbcon.getConnection();
st=c.createStatement();
String senderid=(String)session.getAttribute("sid");
String key1=request.getParameter("key");
System.out.println("Key Value is1 : " +key1);
System.out.println("SEnder is : " +senderid);
String query="select keyvale from keygenerate_twm where userid=’"+senderid+"’";
System.out.println("Query Value is : " +query);
rs=st.executeQuery(query);
while(rs.next()){
key=rs.getString(1);
System.out.println("Key Value is : " +key);
}
if(key.equals(key1))
{%>
<tr><td> Your Key is Validated Plz <a href=./OpenContent?receiver=<%=session.getAttribute("user") %>>Open Message
</a></td></tr>
<%}
else
{%><tr><td> Your Key is Not Validated Plz <a href=./Authenticate.jsp>Re Login</a></td></tr>
<%}%>
</table>
<pre>[/php]
Database connection is established and the corresponding key entered by the current user is validated across the database using the statement by fetching the original key of the sender. If both the keys match, now the user can open the message and Open content attribute is used to achieve this and if the key does not match an error message is displayed as shown in the below screens.
Nice project..Can you please send me the documentation for the above project(Enterprise Collaboration Tool in Java and Oracle) on this mail id: jaspreet1522@gmail.com