
Introduction
Online Question paper submission is a web portal that is developed or implemented in the ASP.NET domain or platform. This project is helpful for the Professor to submit the question paper to the examination cell or to the Examiner from this site. In the current generation preparing the question paper and handovering in the examination cell is not that much security. This project is developed for a Professor to maintain his details, experience, and preparation of question paper and submit the same to the examiner. The examiner also gives his information, experience and takes approval from the administrator, and then selects the question paper. This project will work on the same line of online examinations; Apart from this, it contains much more additional information such as Course type, Department details, and other details of professors and examiners in this web portal.
For the examination cell, it is very difficult to identify whether the particular question paper is submitted or not. The online Question paper submission portal is implemented in 3 main modules. Professor module, Examiner module, and Admin module. Admin module will add multiple courses and departments under different branches so Professor can easily know the best details of about subjects. The professor module ought to register with the application and choose the course and upload the question paper to the site.
Scope of the Project
The scope of the project is used to manage the details of the professor, Examiner, and Administrator. The Professor and Examiners Sign up by providing the appropriate information and then take approval from the administrator. According to course-wise Professors prepares the question papers and send them to the examiner, then the examiner selects the question paper and submits it to the board. And all these records are stored in Online Question Paper Submission Database.
Design of the Project:
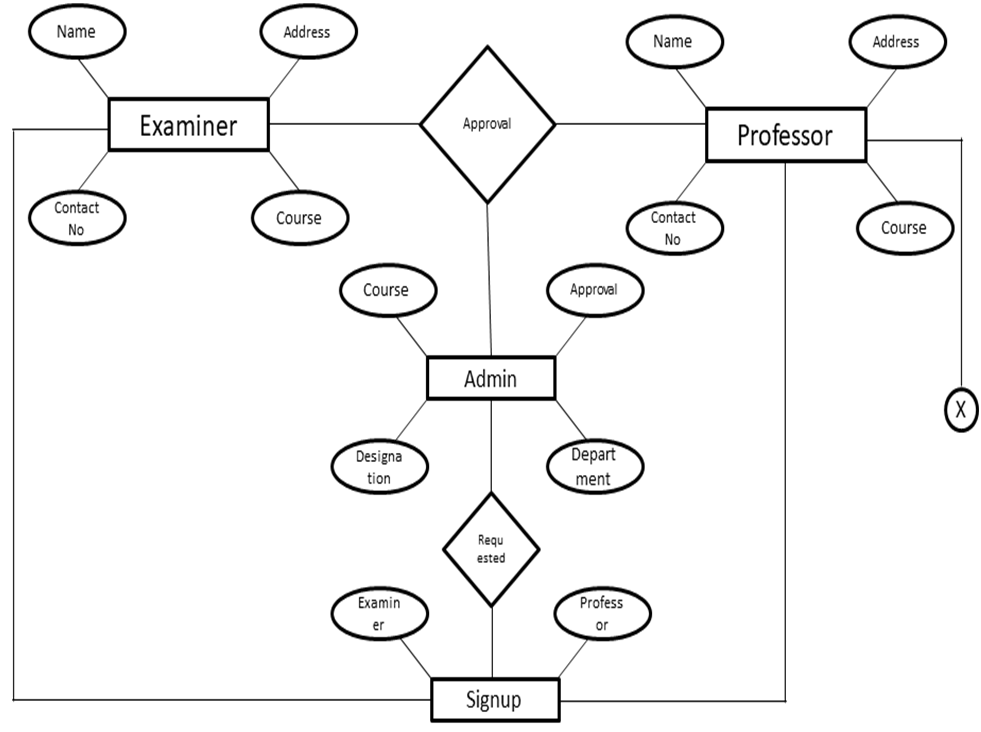
ER Diagram:
Main Modules of the Project
Administrator
He administrates by giving approval to Examiner and Professor’s Signup. He also creates Courses, Departments, and Designations in order to fetch the correct and appropriate question paper for that course and department.
Course Details
It is created by the Admin and it consists of Details of specific courses like BCA, BBA, BCOM, and more. The professor sends the Question paper on the basis of the Course.
Department Details
It is created by the Admin and it consists of Details about the entire department which is created. The Department section consists of the Department name and Address of that Department.
Designation Details
It is created by the Admin and it consists of Details about the Designation of a particular professor. This section consists of Designation names like Ass-professor, HOD, and so on, it also has a description section under the Designation name which helps us to know which particular department the professor’s designation is from.
Professor’s Signup
In this section, any professor can sign up. But the request is only approved by the Admin. This section consists of the Login name, name of the professor, password and confirms password to confirm, phone number of that particular professor-main ID, and at last the address of that professor.
Examiner’s Signup
In this section, any Examiner can sign up. But the request is only approved by the Admin. This section consists of the Login name, name of the examiner, password, and confirm password to confirm, and here it consists of designation and department where the examiner can select any of the given designations and department. At last, it asks for the Address and a photograph of that particular Examiner.
Approval for both Professor & Examiner
This action is performed by the Admin. He approves both professor and Examiner.
Login for professor & Examiner
A Professor who has been approved by the Admin can now log in to the Login section and the same for the Examiner too.
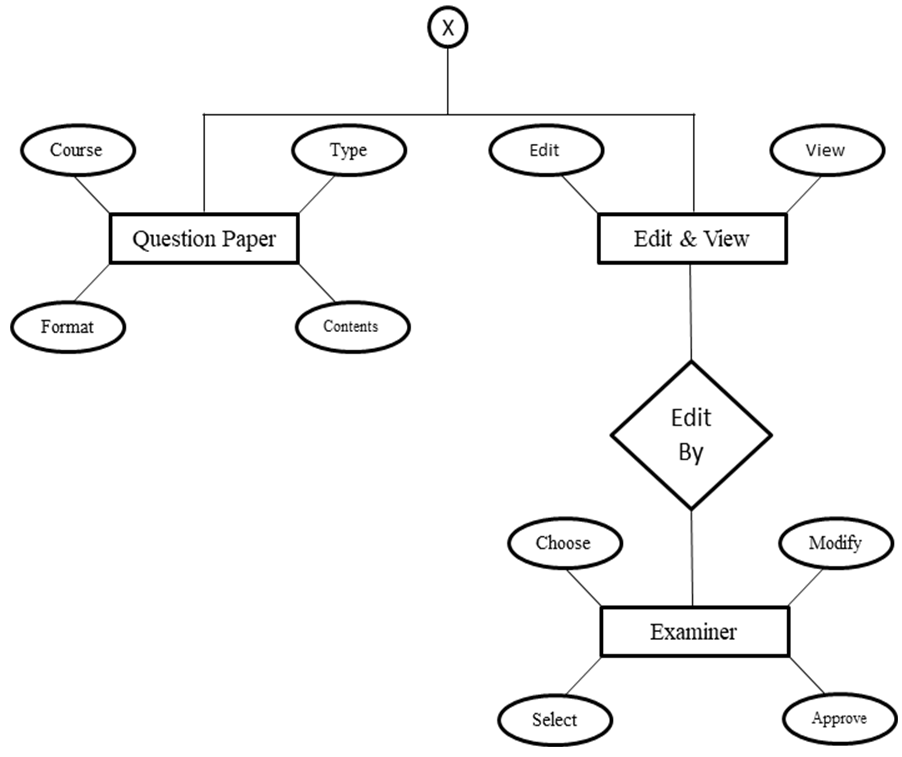
Details of Question paper
Every Question Paper must be sent with appropriate details so as to know more about the paper at a single glance.
View and Edit the Question Paper
It is viewed and Edited by the Examiner and it is submitted to the University.
Final Reports
It creates and shows all the database records of this project.
Screenshots of Online Question Paper Submission System:
- Home Page
- Admin Login Page
- Admin Main Screen Lists Section
- Admin Main Screen Create Section
- Admin Main Screen Approval Section
- Admin Department list
- Admin Designation List
- Course Creation Section
- Department Creation Section
- Designation Creation Section
- Home Screen Signup Section
- Professor Signup
- Professor Approve Section
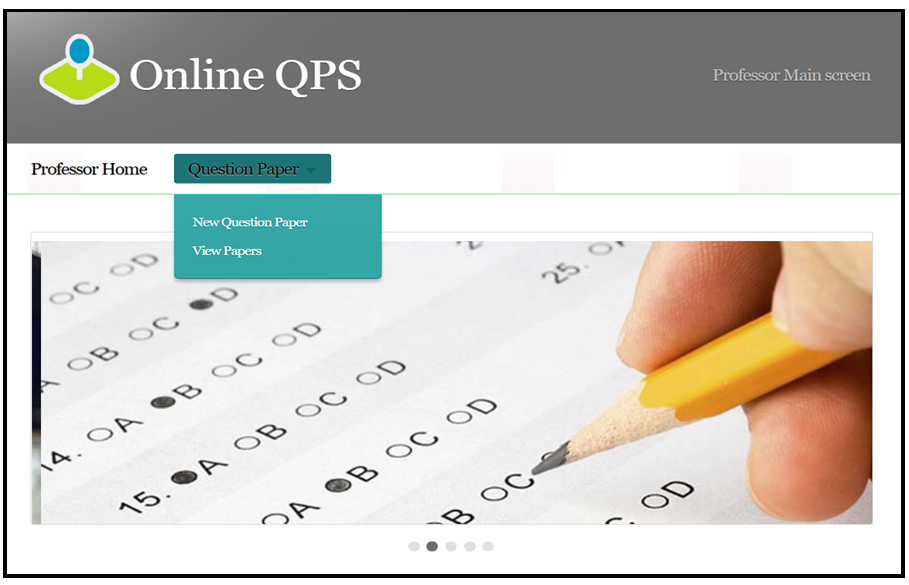
- Professor Main Screen
- Examiner Signup Section
- Examiner Approve Screen
- Examiner Approve Page
- User Login Page
- Examiner Main Screen
- Examiner Document Viewing Screen
- Professor New Question Paper Screen
- Examiner Acknowledgment Screen
Conclusion
It is believed that in the future Online Question Paper Submission centralized document system with the concept of cloud technology will recede in importance as a strategic application to become a competitive necessity that must be adopted by most government departments.
India is striding smoothly towards integrated E-Governance. In the next five years, situation will be entirely different. Most companies are adopted cloud technology for the maintenance of documents.
Online Question Paper Submission creates a new trend in maintaining and verifying documents online and it reduces the workload.
Future Enhancements
- The news feed is essential for our day-to-day purpose; hence we will add a section about the news. There, we are going to display the news about examination dates, deadlines for submitting papers, etc.
- We are going to add some more security to our system like an OTP number for verification of the Professor’s and Examiner’s Phone numbers.
- Authentication of Professor and Examiner is also important, thereby uploading the College Approval Letter by Principal (Signed and Sealed), makes it Admin easy to verify them.
- We will add a few more Image File Formats such as TIFF, GIF, PNG, JPEG, etc. in order to make Professor and Examiner upload photocopies easily.
- To make a question paper, Professor has to be experienced; therefore we will add a new section while signing up called Years of Experience. In that section, the professor has to enter how many years of experience he/she has in the teaching profession.
- Live communication between Professor and Examiner makes it easy to fix the problems; therefore we will add live messaging on the portal.
Download the complete asp.net, vb.net project code, and SQL database on the Question Paper Submission project.


