Introduction
Essays are a widely used tool to assess the capabilities of a candidate for a job or an educational institution. Writing an essay given a prompt requires comprehension of a given prompt, followed by analysis or argumentation of viewpoints expressed in the prompt, depending on the needs of the testing authority. They give a deep insight into the reasoning abilities and thought processes of the author, and hence are an integral part of standardized tests like the SAT, TOEFL, and GMAT.
With essays comes the need for personnel qualified enough to carry out the process of grading the essays appropriately and ranking them on the basis of various testing criteria. Our project aims to automate this process of grading the essays with the aid of Deep learning, in particular, using Long Short Term Memory networks which is a special kind of RNN.
Automated Essay Scoring (AES) allows the instructor to assign scores easily to the participants with a pre-trained deep learning model. This model is trained in such a way that the scores assigned are in agreement with the previous scoring patterns of the instructor. So this needs the dataset which contains the information of scores given by the instructor previously. AES uses Natural Language processing, a branch of artificial intelligence enabling the trained model to understand and interpret human language, to assess essays written in human language.
Problem Definition
Given the growing number of candidates applying for standardized tests every year, finding a proportionate number of personnel to grade the essay component of these tests is an arduous task. This personnel must be skilled and capable of analyzing essays, scoring them according to the requirements of the institution, and be able to discern between the good and the excellent.
In addition to this, there are a lot of time constraints in grading multiple essays. This can prove to be cumbersome for a limited number of human essay graders. Having to grade several essays within a deadline can compromise the quality of grading done. Thus, there is a clear need to automate this process so that the institution carrying out the grading can focus on evaluating other aspects of the candidate’s profile.
The challenge was to create a web application to take in the essay and predict a score. We need to train a neural network model to predict the score of the essay in accordance with the rater. The model is to be made using LSTM.
Approach
In order to meet the need for automation of essay grading, we propose an application that provides an interface for users to choose an essay prompt of their choice and provide a response for the same. The user’s response is graded by the application within seconds and a score is displayed.
This application makes use of the technologies of Natural Language Processing that performs operations on textual input, and LSTM, which is used to train a model on how to grade essays. The application also uses the Word2Vec embedding technique to convert the essay into a vector so that the model can be trained addresses the issue of time constraints; automated grading takes place within seconds as compared to physical grading which requires minutes per essay. The net amount of time saved over a period of consistently using the application is vast; costs of maintaining human graders are also saved.
The application gives an output from the pre-trained LSTM model. The model is trained using a dataset provided by Hewlett Foundation in 2012 for a competition on Kaggle.
Web Application (Output)
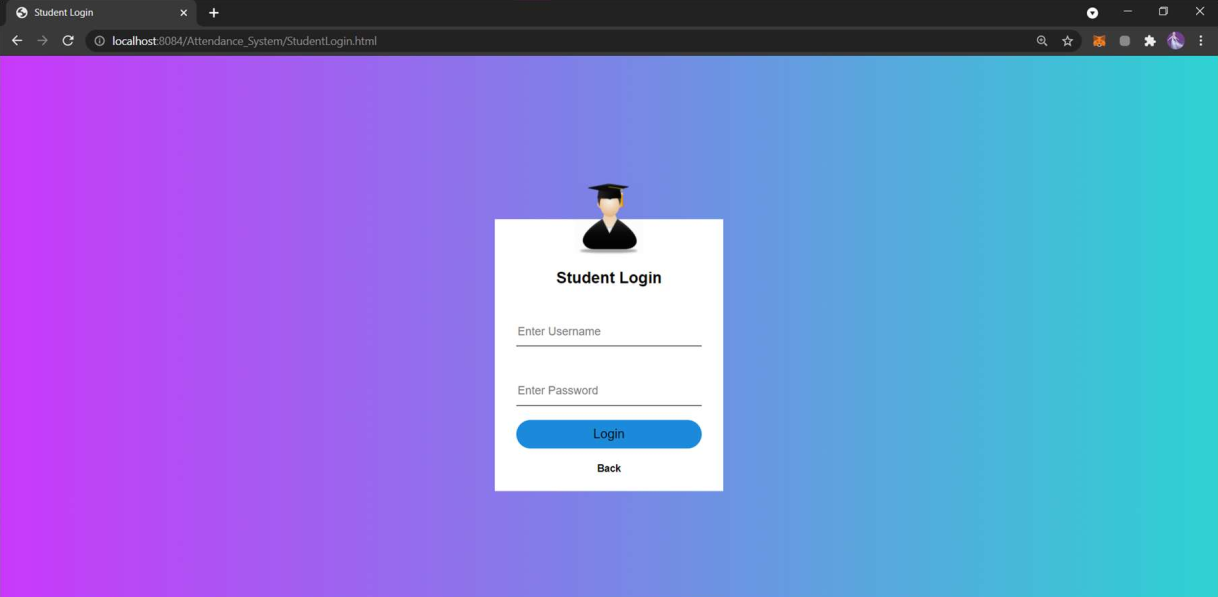
The front end of the application was implemented using HTML, CSS, and Bootstrap. It provides the option for users to choose from a set of prompts and write an essay accordingly or to grade their own custom essay.
The landing page of the application:

Software Specifications
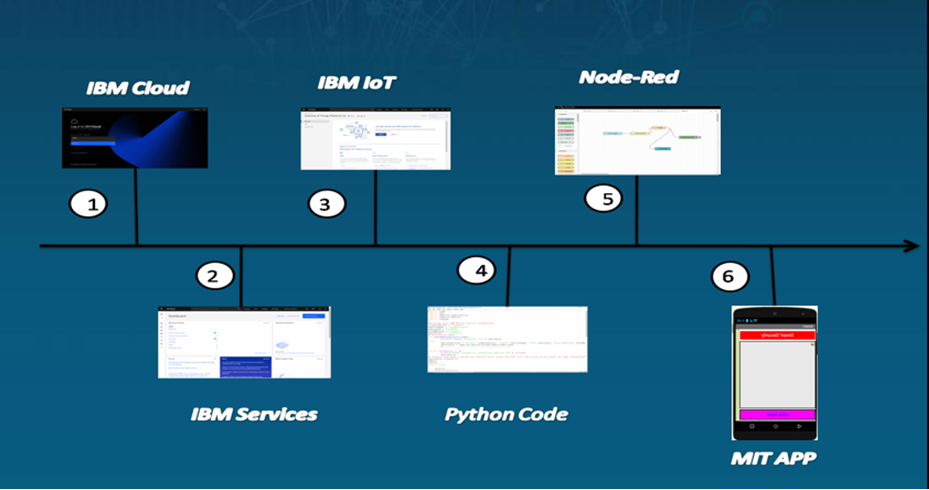
This application is developed primarily using Python, for the purposes of running the app. The model was built and trained on Jupyter Notebook. The front end of the application was designed with HTML, CSS, and Bootstrap. All the components of this application were integrated with the help of the Flask App, and the final project was deployed on IBM Cloud.
While training the model, the dataset was imported into the model with the Pandas library. Pandas library used was v1.3.0. Numpy v1.19.2 was used to handle array data structure. Natural Language ToolKit v3.6.2 was used to tokenize essays to sentences written in English and also to remove stopwords to make sure the sentences contain only relevant words. RegEx(re) package v2.2.1 was used to remove unnecessary punctuations and symbols present in the essay or sentences. Our model utilizes the Word2Vec technique to convert words to corresponding vectors. Word2Vec v0.11.1 was used to convert words into vectors. Tensorflow v2.5.0 was used to build the model. ScikitLearn v0.24.2 was used for data preprocessing.
To make use of the application, the user needs to have access to a stable internet connection and an operating system compatible with the latest versions of most browsers. In the absence of an internet connection, the application can be run locally. Still, the user needs to have the authorization to access the source code of our project for the same, which is not recommended for intellectual property purposes.
Future Scope
This application could be integrated and used by several testing institutions to meet their needs for essay grading. The model used could be trained with an increasing number of input essays to further improve its accuracy. The model could also be trained on giving a score on specific criteria of essay grading such as relevancy, linguistic and reasoning ability of the author. Research could be conducted on making the model faster. This technology could also be extended for use with languages other than the English language, effectively rendering it useful on a worldwide level.