Online Banking Website Project using HTML, CSS, and JavaScript

In this academic project, we are going to create an Online Banking Website using basic HTML, CSS, and JavaScript. We have planned and going to create as per the design given by the instructor. Which include:-

  • A home page that will provide all the necessary views. And it includes the link to the various linked pages (login/signup page, services, fixed deposit, e-services, account details, about us).
  • The top bars include the link to every single linked page.
  • We are going to provide services like Personal internet banking, Corporate banking, Merchant business, and Online tax.
  • Payment transfer: – International transfer, National transfer, Bill payment.
  • My Account page contains: – Account No. , Bank / Branch. IFSC Code.
  • ABOUT US page which shows the details of our contacts and our headquarters.2 Online Banking Websites

Concept:-

  • We have used the concept of HTML Programming like o Hyperlink projection.
  • Use of different tags to make it visually better like font, table, listing, hyperlink, styling, etc.

Use of:-

  • Combo Box
  • Search Box
  • Button
  • Text Field
  • Label
  • Fieldset
  • Legend

This project is basically an online banking website where one can create his/hers bank account, and use the same account for various banking services.
All designing and programming are done by us only.
All the members have their role in creating this website.

PROJECT DESCRIPTION

Project Name: Online Banking Website

Languages Used: HTML, CSS, JavaScript

Software Used: Visual Studio Code

Browser Used:  Google Chrome

Description:

This project is not a pure website that works on the internet. This project is just a template of a bank website, which can be used with the backend to create a perfectly working website. This website is work fine with JavaScript, CSS (Cascading Style Sheet), and HTML (Hyper Text Markup Language), with some simple concepts to make it a Responsive Web Page.

PROJECT CONTENT

This website is consist of various HTML pages, which are linked to each other with links (either by link or anchor tag).

Following are the HTML file names involved in the project:

  1. html (Home Page)
  2. html (Login Page)
  3. html (Sign Up Page)
  4. html (Personal Internet Banking)
  5. html (Corporate Banking)
  6. html (Merchant Business)
  7. html (Online Tax)
  8. html ( International Money Transfer
  9. html (National Money Transfer)
  10. html (Bill Payment)
  11. html (Fixed Deposit)
  12. html (E-Services)
  13. html (My Account)
  14. html (About Us)

Following are the CSS files name involved in this project: (Here, we used a simple convention in the naming of the files: “<html_file_name>CSS.css”

  1. css (Home Page)
  2. css (Login Page)
  3. css (Sign Up Page)
  4. css (Personal Internet Banking)
  5. css (Corporate Banking)
  6. css (Merchant Business)
  7. css (Online Tax)
  8. css ( International Money Transfer
  9. css (National Money Transfer)
  10. css (Bill Payment)
  11. css (About Us)
  12. css (My Account)
  13. css (Fixed Deposit)
  14. css (E-Services)

Following are the JavaScript file names involved in this project:

  1. js (Login Page)
  2. js (Sign Up Page)
  3. js (Personal Internet Banking)
  4. js (Fixed Deposit)
  5. js (Bill Payment)

CONCEPTS USED

As above mentioned, this template website is made up of HTML, CSS, and JavaScript.

The concept used in HTML:

  1. Using the link to add an external CSS file to it.
  2. Using the “src” attribute with the “script” tag we link external JavaScript.
  3. Using the “div” tag to separate various parts of the webpage to give functionality and style separately.
  4. Using “h1” tags to give a heading.
  5. Using “img” tag to give images on the webpage.
  6. Using anchor (“a”) tags to link multiple HTML files to each other.
  7. Using “id” and “class” attributes with different tags to give them style and functionality accordingly.
  8. Using the “form” tag to use the form for the login and sign-up page.
  9. Using the “method” attribute’s value as “POST” to give the form data securely.
  10. Using “input” tags to make an input field for the users. (With its different types.)
  11. Using “onload”, “onclick”, “onblur”, “onchange” with its value to call the functions which are in the respective JavaScript files on loading the webpage, on clicking a button, on losing focus, and changing the state respectively.
  12. Using “label” tags to create labels for the input fields.
  13. Using “select” tags to create a drop-down menu or combo box in the form.
  14. Using “option” tags inside the “select” tag to give options in the drop-down menu.
  15. Using “button” tags to create a button for submitting and resetting the form.

The concept used in CSS:

  1. Using “#” and “.” to access elements with their id and class values respectively.
  2. Using some pseudo-classes to make a somewhat interactive web page. (Without using JS.)
  3. Using media queries to make the page responsive for some specific display ratios.
  4. Using “@import” for importing another CSS file to a specific file.

The concept used in JavaScript:

(In this project, JavaScript is used mainly for form validation and for interactive buttons.)

  1. Using Regular Expression (RegEx) for creating a pattern for email and password validations as they have a specific pattern in them.
  2. Using “window.location.replace()” to go to a specific location on calling it.
  3. And using other pre-defined functions to create our user-defined functions.

CONTRIBUTION BY TEAM MEMBERS:

  • The idea of the project and its structure of it.
  • Creating all JavaScript files, to make our web pages interactive.
  • Final touch-up to the project.
  • Creating all CSS files, to make our web pages beautiful.
  • Creating all HTML files, to add content into it.

PROJECT IMPLEMENTATION:

Here are some images of our project.

  • home.html
  • acc.html
  • login.html
  • signUp.html
  • billPay.html 

CONCLUSION

This online banking website project is completed in two scripting languages i.e. HTML and CSS, and JavaScript.

There is a total of 14 .html pages which are linked together to create a full website template for online banking.

In this project, all three developers work equally, with the same amount of effort.

REFERENCES

1. w3school.org
2. geeksofgeeks.com
3. developer.mozilla.com

Download the complete project on code, report of Online Banking Website Project using HTML, CSS, and JavaScript

MOODIFY – Suggestion of Songs on the basis of Facial Emotion Recognition Project

Modify is a song suggested that recommends the song to the user according to his mood. ‘Modify’ will do the job leaving the user to get carried away with the music.

I/We, student(s) of B.Tech, hereby declare that the project entitled “MOODIFY (Suggestion of Songs on the basis of Facial Emotion Recognition)” which is submitted to the Department of CSE in partial fulfillment of the requirement for the award of the degree of Bachelor of Technology in CSE. The Role of Team Mates involved in the project is listed below:

  • Training the model for facial emotion recognition.
  • Designing the algorithm for image segregation.
  • Algorithm designing for music player.
  • Graphical user interface designing.
  • Testing the model.
  • Collection of data for model and music player.
  • Preprocessing of the data and images.

Dataset:

The dataset we have used is “Cohn-Kanade”. 
This dataset is classified so we cannot provide the actual dataset but the link for you to download is :
http://www.consortium.ri.cmu.edu/ckagree/index.cgi
And to read more about the dataset you can refer to:
http://www.pitt.edu/~emotion/ck-spread.htm

Feature Extraction and Selection:

1. Lips
2. Eyes
3. Forehead
4. Nose

These features are processed by CNN layers and then selected by the algorithm and then they are converted to a NumPy array then the model is trained by that and the following three classifications are made.

How this project works:

  • First Open the Application, CHOOSE THE MODE IN WHICH YOU WANT TO LISTEN to THE SONG
  • Then it shows “YOUR MOOD, YOUR MUSIC”
  • Press “OKAY TO CAPTURE THE IMAGE”
  • After that press “c” to capture
  • You seem Happy please select your favorite genre
  • You seem Excited please select your favorite genre
  • You Seem Sad please select your favorite genre

CODE DESCRIPTION

  • All libraries are imported into this.
  • Model Initialization and building.
  • Training of test and testing.
  • Training our model
  • Model Building, Splitting of test and train set, and training of the model.
  • Saving a model.
  • Loading a saved model.
  • Saving image with OpenCV after cropping and loading it and then the prediction
  • Suggesting songs in Offline mode
  • Suggesting songs online(Youtube)
  • Rest of the GUI part
  • Variable Explorer

IPython Console

  • Importing Libraries
  • Model Training
  • Model Summary
  • Online Mode
  • Offline Mode

GUI

  • Splash Screen
  • Main Screen
  • Selection screen
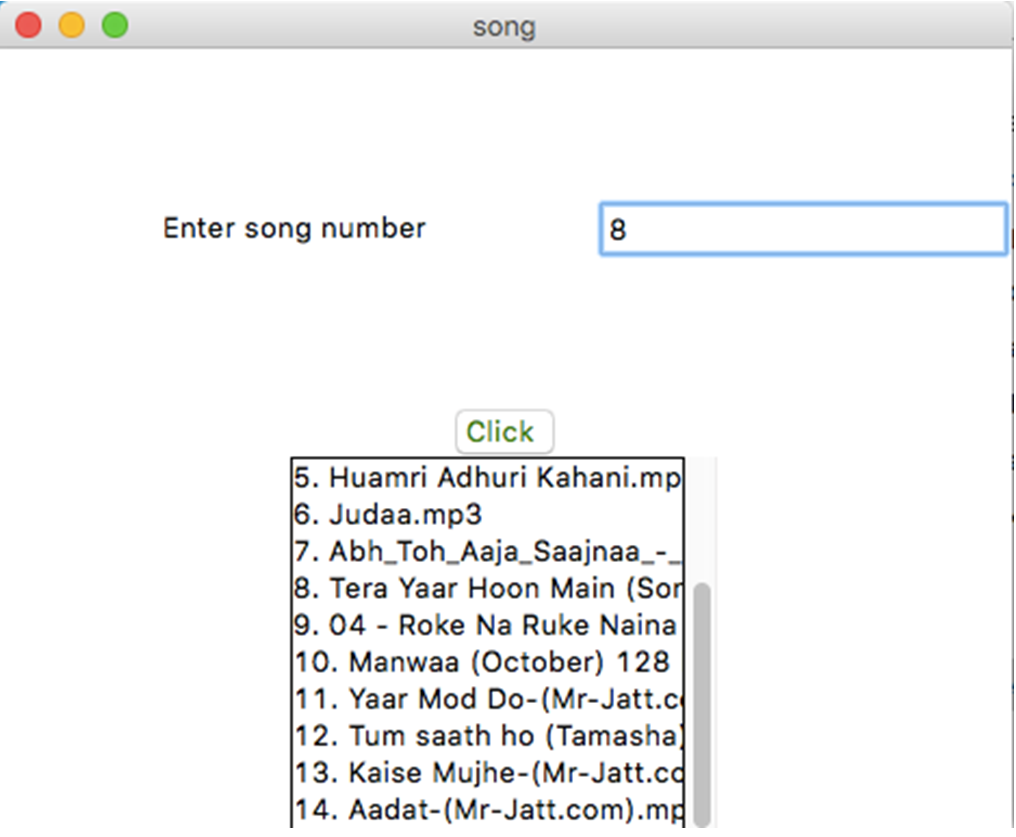
  • Display songs and then select them, after that they will play

Summary

We successfully build a model for Facial Emotion Recognition(FER) and trained it with an average accuracy over various test sets of over 75%. Then we successfully build a Desktop application to suggest songs on the basis of their facial expression and hence completed our project. This FER model can be widely used for various purposes such as home automation, social media, E-commerce, etc and we have the motivation to take this project to a next level.

Download the complete Project code, report on MOODIFY – Suggestion of Songs on the basis of Facial Emotion Recognition Project

Implementation of E-voting Machine Project using Python and Arduino

INTRODUCTION

Our E-voting Machine project is very useful, This Project was implemented using Python and Arduino. The user is no longer required to check his register in search of records, after the voting procedure gets over, the admin will be able to calculate the total number of votes in just one click since the entire work is done using computers. The user just needs to enter his/her unique voter ID.

In today’s world, no one likes to manually analyze the result after the voting procedure gets over because the process is time-consuming and of which results get usually delayed. Everyone wants his/her work to be done by computer automatically and displaying the result for further manipulations. So this E-voting Machine project is about providing convenience regarding voting.

OBJECTIVE

  • Our objective for the E-voting Machine project is to make a user-friendly Electronic Voting Machine that makes the current voting process faster, easier, and error-free.
  • We have used Arduino in our project for the implementation of push buttons and Python as a programming language.

PROBLEM STATEMENT 

The problem statement was to design a module:

  • Which is a user-friendly E-voting Machine
  • Which will restrict the user from accessing other users’ data.
  • Which will ease the calculations and storage of data.
  • Which will help the jury to declare the result without any biasing.

FUNCTIONS TO BE PROVIDED:

The E-voting Machine system will be user-friendly and completely secured so that the users shall have no problem using all options.

  • The system will be efficient and fast in response.
  • The system will be customized according to needs.

FOR e-VOTING SYSTEM

  • (Check
  • Store
  • )

SYSTEM REQUIREMENTS

  • Programming Language Used: Python, C
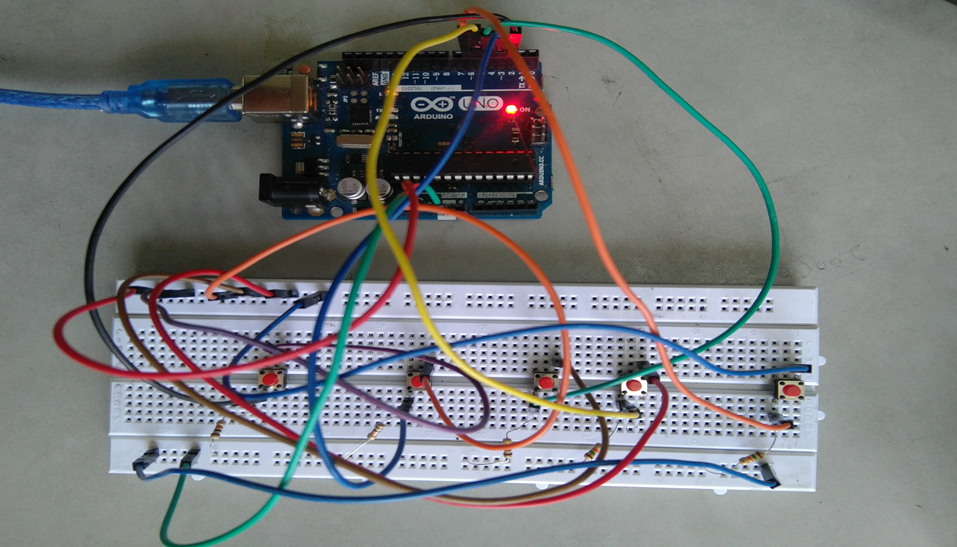
  • Hardware Used: Arduino UNO
  • Components Used: Push buttons, Connecting Wires, Resistances(100k ohm), Breadboard
  • Software Used: Anaconda 2.7.x, Python 2.7.x, Arduino IDE
  • Modules Used: Serial, SQLite, Tkinter, tkMessageBox

WORKING

  • The user has to enter his/her ID in the system.
  • After verifying the user ID, the system will show a message that whether a user is eligible to vote or not after checking his/her details stored in the system.
  • A message will be displayed accordingly. The user will then have to press the button against which the name of the candidate is written and whom he/she wants to vote.
  • The votes hence are stored in the database and the results will be announced accordingly.

FUTURE SCOPE OF THE PROJECT

My project “e-VOTING SYSTEM” will be a great help in conducting voting at various organizations. So the modifications that can be done in our project is to add one major change which can be done in this project is to add the data of the voters. This will result in the total identification of the voter.

CONCLUSION

From this E-voting Machine project, we can conclude that this program is very useful in conducting the voting procedures smoothly. It provides easy methods to analyze the voting result. It helps in conducting faster, more secure, and more efficient voting. The program can be used per the norms of the voting requirements.

Download the complete project code, report, and PPT on E-voting Machine using Python and Arduino.